Easy Cold Tapas Recipes to Make with your Students
Introduce your students to Spanish cuisine with these easy, no-cook tapas recipes!
Frequent visitors to my blog know how much I love cooking with my world languages students. Food is such a wonderful entry point to cultural understanding, and it’s a great way to build buzz for your program. Cooking also teaches students important life skills and builds confidence. You can read about the many benefits of cooking with your classes here, and check out some recipes to do with French students at this link.
“When I was making the pita con humus y pepino, I didn’t think I would like it. But I was surprised. It was really good!”
This past spring I suddenly found myself teaching Spanish for the first time in 10 years when my school had an unexpected vacancy. This led to an important question: what to cook?
I don’t have a lot of equipment; just a standard classroom with a microwave and some electric griddles. No sink. No oven. No deep fryer. (Not that I want to deep fry with 12 year olds!!)
The solution? Tapas!
My students enjoyed learning about the culture surrounding these small plates. We watched a couple of videos.
and then it was time to cook!
With a little research I found four cold tapas we could make in class.
Pan con tomate y jamón
Pita con humus y pepino
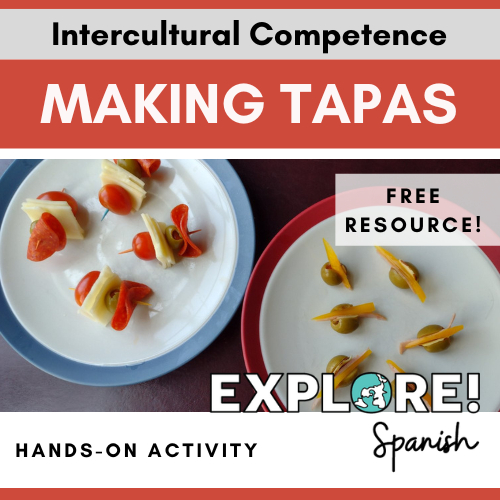
Brochetas de salchicha, queso, y legumbres
Aceitunas rellenas
Of course, I’ve modified the ingredients to be simple, cost effective and / or easily available. For example, instead of delicious (and expensive) Serrano ham, we used lunchmeat… perhaps one day a parent will donate the real item and our experience will be more authentic. Until then, my students will have to enjoy the spirit of Spanish tapas, adapted for our middle school classroom!
Here are the ingredients and instructions for each tapa:
1. Pan con tomate y jamón
Pan con Tomate y Jamón
Ingredients:
Baguette-style bread
Small jar of spaghetti sauce
Ham lunchmeat (I had turkey available as a substitute for students with religious or dietary restrictions)
Preparation:
Slice a baguette into 1 cm slices
Chop ham / turkey into small squares.
Assembly:
Spread spaghetti sauce onto a baguette slice
Add ham squares in decorative folds.
Pita con humus y pepino
Ingredients
Pita bread
Humus
Cucumber
(if desired) dill sprigs
Preparation:
Slice the pita into quarters.
Cut the cucumber into thin slices.
If using dill, cut off small sprigs.
Ingredients for pita con humus y pepino
Assembly:
Spread humus onto a pita triangle
Add cucumber slices
Add a dill sprig.
Brochetas de salchicha, queso, y legumbres
Ingredients:
Frilly toothpicks
Sliced pepperoni
Jarlsberg (or swiss) cheese
Cherry or grape tomatoes
Green Olives
Ingredients for brochetas
Preparation:
Use a cheese slicer to cut thin strips of cheese.
Assembly:
Fold the pepperoni and cheese slices
Spear on a toothpick with an olive and cherry tomato.
Brochetas de Salchicha, Queso, y Legumbres and Aceitunas Rellenas
Aceitunas rellenas
Ingredients:
Green Olives. (Large / Queen olives work well, but are more expensive.) Regular sized green olives can work if students are careful.
Slivered almonds (check for allergies)
Red or Yellow bell pepper
Ham (or turkey) lunchmeat
Ingredients for Aceitunas Rellenas
Preparation
Slice very thin strips of bell pepper and lunchmeat.
Assembly:
Cut a slit into your olive (but don’t cut all the way through!)
Stuff your olive with a sliver of almond, meat, and pepper.
Making the Tapas
There are different ways to approach the logistics of making tapas. In our class, I divide students into four groups. Each group prepares the ingredients for one tapa by slicing bread, meat, cheese, and vegetables. Once all the ingredients are prepared, everyone visits all 4 stations to assemble their own tapas.
When everyone has assembled their four tapas, we all try them together and share our opinions. Sometimes students are skeptical of these recipes - after all, this isn’t typical teenager fare! For some, it’s their first time trying humus, jarlsberg, or olives. I encourage kids to be adventurous, and usually students like the tapas more than they expected!
Last year Leandra, one of my eighth graders, burst out laughing when she saw the tapas recipes we were making. I challenged her to give them a try and, to her surprise, she loved them. She told me, “The pita con humus and pepino was my favorite. When I was making it, I didn’t think I would like it. But I was surprised. It was really good!”
A choice of grape or apple juice makes a great final touch for this lesson.
A couple of cautions:
Be alert to dietary needs. These recipes are pretty easy to modify by substituting or leaving off ingredients. If you have nut allergies in your classroom, skip the almonds. Some students have religious restrictions to pork products, so you may need to substitute the ham and pepperoni with turkey. In this case, you should also reserve a knife and cutting board that has never touched ham.
This lesson does use knives, so I give my students a short but serious talk about knife safety. (Knives should be on the cutting board or in your hand touching food - nowhere else!) I demonstrate good and bad cutting techniques to avoid injuring fingers. I also bring in old, dull steak knives for students to use. Using knives requires care and precautions, but I have never had a knife incident - even in middle school. Just know your students and address the issue head on.
Making tapas with my classes has been a ton of fun! Have you tried it? Do you know of other tapas we should do? Share in the comments, and ¡buen provecho!


